
How to Integrate Biometric Attendance Machine Web Application
Integrate Biometric Attendance Machine with Web Application
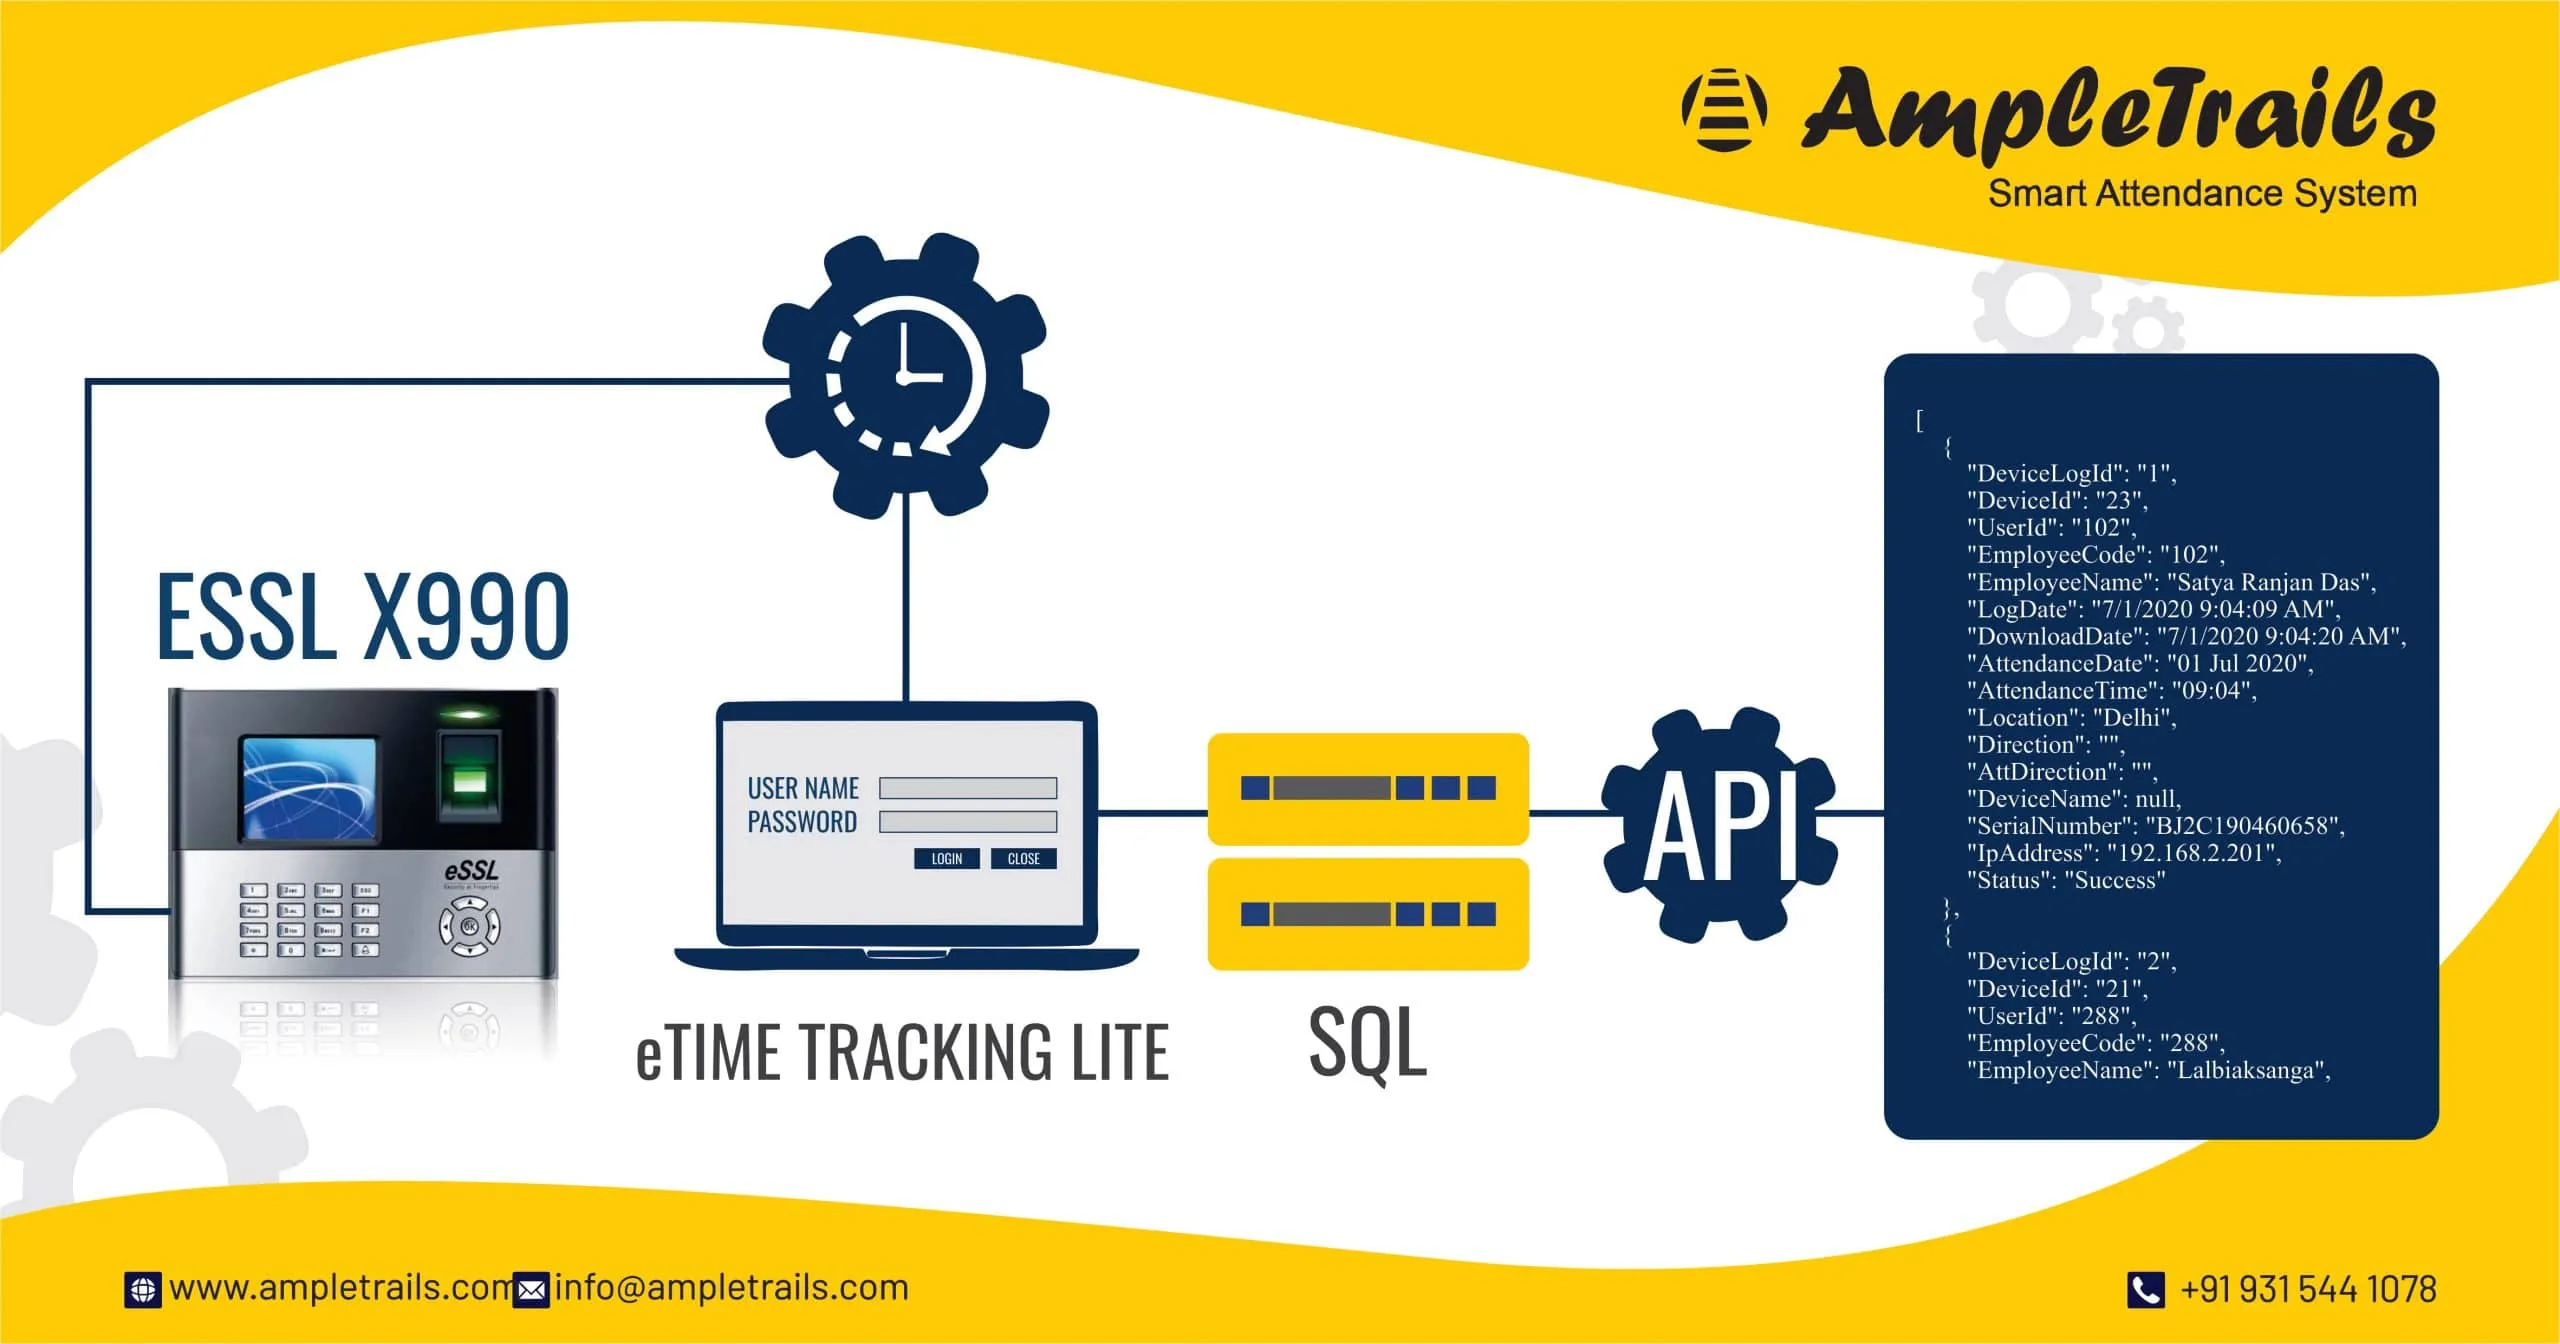
Web API
For Integrate Biometric Attendance Machine with Web Application following are required.
- Web Application
- Static IP Address or Domain Name
- Database to store the data
The first step is to download and host the Web application. Associate the database with the mobile application. Associate the Static IP address or Domain name with the Web Application.
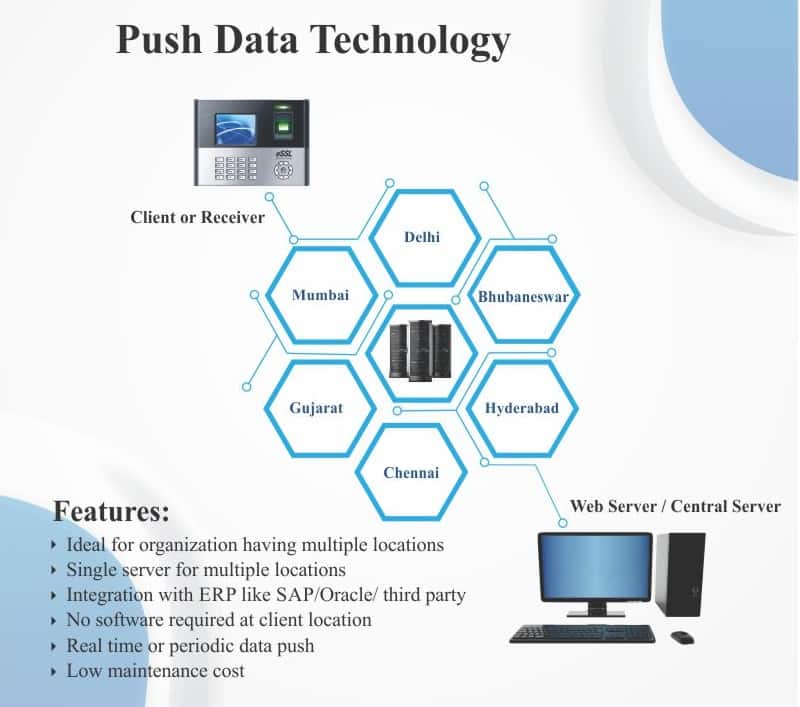
Attendance System for Multi Locations
Integrate biometric attendance machine with web application
In all the modern devices with Push Data technology, there is an option to add a Server Address and Port number. In the Server, address enter the static IP Address or Domain Name along with the port number if assigned to the Web application. Connect the device with the network.
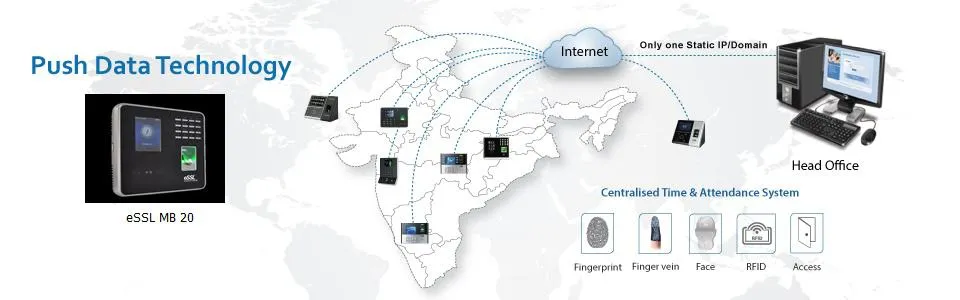
MB20 Face Fingerprint Attendance Machine with Push Data
Once the above step is done the device will start sending the data to the server. In some of the Web applications, you need to specify the Sr. No. or cloud Id or Mac address of the device whose data it should take and store into the database.

Time Attendance Software EtimeTrackLite
Once you start getting data into the database you can either use the Web Application to generate the reports or the other option is to use the APIs to fetch the data. To get the Attendance System for Multi Locations call us on 9034757673 or fill out the following form so that one of our experts can call you.
Integrating a biometric attendance machine with a web application can be a complex process, but it can be achieved by following these steps:
- Connect the biometric attendance machine to the network: The first step is to connect the biometric attendance machine to the network, this can be achieved by either connecting it to a wired or wireless network. It is important to ensure that the biometric attendance machine is connected to the same network as the web application.
- Configure the biometric attendance machine: The next step is to configure the biometric attendance machine to make sure it can communicate with the web application. This typically involves setting up the IP address, port, and other network settings on the biometric attendance machine.
- Develop the web application: Develop a web application that can communicate with the biometric attendance machine and receive the attendance data. This typically involves creating a web interface that allows users to view and manage the attendance data, as well as a backend system that communicates with the biometric attendance machine.
- Connect the web application to the biometric attendance machine: Once the web application has been developed, it needs to be connected to the biometric attendance machine. This typically involves using a protocol such as TCP/IP to communicate between the web application and the biometric attendance machine.
- Test the integration: After the web application has been connected to the biometric attendance machine, test the integration to ensure that the attendance data is being received and displayed correctly on the web application.
- Deploy the solution: After testing, deploy the solution on a production server or hosting platform, and make it accessible to the end users.
It’s important to keep in mind that the specific steps and requirements for integrating a biometric attendance machine with a web application may vary depending on the specific machine, web application and the protocol used for communication. It is recommended to consult the documentation of the biometric attendance machine, and consult with the developer of the web application to ensure a smooth integration.
In conclusion, integrating a biometric attendance machine with a web application can be a complex process, but it can be achieved by connecting the biometric attendance machine to the network, configuring the machine, developing the web application, connecting the web application to the machine, testing the integration and deploying the solution.
 Matrix Cameras
 Matrix Product
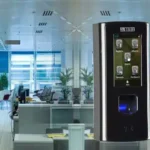 Biometric Machines